






HOW TO REPAIR A CAT'S SCRATCHES ON A LEATHER SOFA?
Cat scratches can cause two types of damage to a leather sofa.


The first shows up as fibres appearing on the corners of the sofa. The second as scratches, a snag, or more rarely a hole, usually on the cushion, recognisable by one or more continuous faded lines.
Balms or polishes are poor solutions. Their action does not restore the texture of the material, it masks the problem. These methods have the advantage of being quick and very affordable, but they do not last over time. For an optimal result, see our complete recolouring technique and you will then be able to achieve a uniform and, above all, long-lasting final colour yourself!
But before dealing with your cat scratch problem, you need to distinguish real leather from fake leather such as imitation leather and leatherette.
-
 −10 %
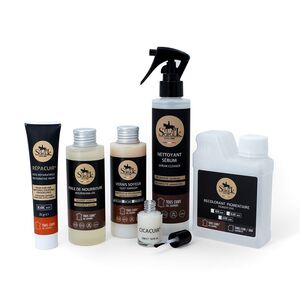
LEATHER SOFA RENOVATION KITS4 different kits to choose according to the size of your sofa
108,94 €98,05 € View product -
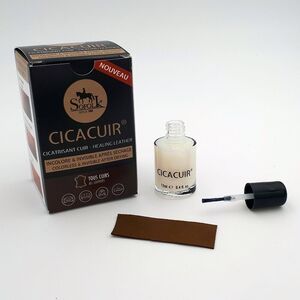 CicaCuir Leather Repair – Repairs cutsInvisible once dry — colourless, does not stiffen the leather, blends in with the grain of the material.
14,99 €
View product
-
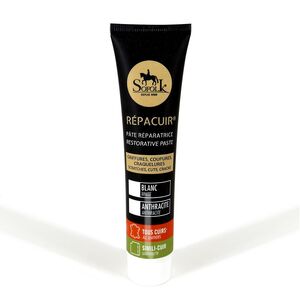 LEATHER REPAIR PASTERepairs scratches, cracks, cuts, holes on the leather of your sofa or armchair
14,99 €
View product
A short 4-step guide to repairing SCRATCHES on a leather sofa

Repairing cat scratches is a task within everyone's reach. A good restoration obviously depends on careful work and the proper use of the products. 30 years of experience in designing products for leather allow us to offer a solution that is accessible to everyone. By following this child's-play guide, you will be able to repair the scratches on your sofa.
The first step is cleaning the sofa. To begin with, lightly sand the areas to be treated. This should be done with fairly fine sandpaper. The purpose of this first step is to remove the original varnish. Next, clean off the sanding residue and degrease the leather. There is no need to buy an expensive specialist cleaner for this: simply use acetone and leave to dry.
The second step is repairing the scratches. It first involves pressing down and bonding as well as possible the small pieces of leather that curl outwards, using our Leather Healer. Then fill in the missing material with the repair paste (or liquid leather). Several applications are needed to fill the gaps, because the paste shrinks as it dries. Sand lightly between each application so that the restored surface is perfectly smooth and flush with the leather. Finally, sand down any unsightly protruding bits (excess repair paste or raised leather).
CAUTION: the repair paste dries in just a few minutes; work in several thin coats to ensure even drying without cracks.
Wait at least 1 hour before the recolouring step. Note that repairing cracks is done in the same way.
The third step tackles recolouring to hide the repairs
As the liquid leather repairer is white or anthracite (your choice), surface recolouring in the same colour as your leather will be essential!
If your leather is black or white, the choice of colour will therefore be obvious. However, if your colour is a specific one, you will need to make a careful choice from our colour chart available to order, or send us a sample for reproduction (more information here).
You will also be faced with a second important choice: should I recolour only the repaired surface, or should I recolour the whole sofa or armchair?
Partial recolouring (also called colour touch-up) can never be perfect. The answer to this question is up to you. It therefore depends mainly on your budget and how demanding you are.
To apply the paint, use a small foam roller, a brush for tricky areas and a sponge for small parts. Apply up to 3 coats of leather paint , waiting 1 hour between each application.

The fourth step is protecting your repair and your colour with a varnish or our protective wax. These protect the colour against rubbing, reduce soiling and waterproof the sofa. This work is essential and must be carried out 48 hours after the previous step. Another coat must be applied 3 weeks later. Application is done with a clean, slightly damp sponge. It is after this step that your sofa will have its final colour.
In summary, cleaning, repairing, recolouring and protecting are the 4 steps of a good repair of cat scratches.
Would you like to see a practical example of the Sofolk technique for restoring a leather sofa? Follow the guide here

