 FR
 EN
 ES
 IT

Leather sofa renovation kit: clean, repair, recolour and protect in one box
A well-lived-in leather sofa eventually loses its lustre: the colour fades on the seats, the surface gets scratched and cracked, and sometimes peels or tears on the armrests. There's no need to replace the furniture.
A renovation kit brings together, in a single box, everything you need to make it look new again, at home and at your own pace.
Sofolk has made its products in France since 1989, using the same ingredients as those used in tanneries.
Depending on its condition, two products deliver most of the result: the pigment leather colourant, which gives the leather an even colour again, and the RépaCuir repair paste, which fills cracks and missing areas before colouring.
In a complete box, they come with the cleaner, the protective silky lacquer and the nourishing oil.
Our repair kits for leather sofas
-
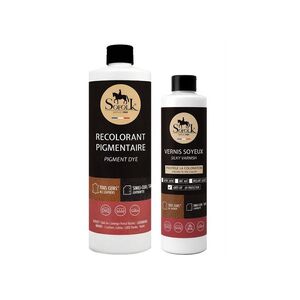 −5 %
LEATHER TOUCH-UP KIT FOR SOFA OR ARMCHAIRTo paint and protect small depigmented and slightly worn areas
45,98 €43,68 € View product -
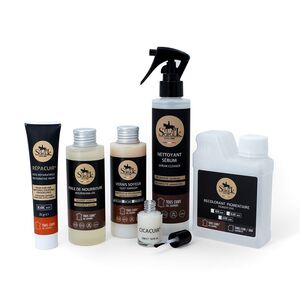 −10 %
LEATHER SOFA RENOVATION KITS4 different kits to choose according to the size of your sofa
108,94 €98,05 € View product -
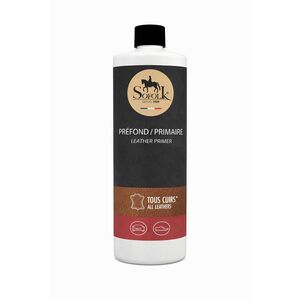 PRIMER FOR PIGMENT DYESGreatly enhances the penetration of Pigment Dye into the leather
19,99 €
View product


Which renovation kit should you choose for your leather sofa?
Every sofa calls for a specific product, depending on the condition of the leather and the extent of the damage. This table helps you identify the one that suits your situation, among the items offered on this page.
| Your situation | The right kit | Why |
|---|---|---|
| Small area where the pigment has worn away or faded, a single seat or an armrest | Colour touch-up kit | Recolours and protects the damaged part locally, with no primer or fixer, without redoing the whole sofa and without any special skill |
| Complete renovation: clean, repair, recolour, protect, then rehydrate | Leather sofa renovation kit (all-in-one box) | Brings together in a single box the CicaCuir healing glue, the repair paste, the pigment leather colourant, the silky lacquer, the nourishing oil and the cleaner; it comes in four sizes, from an armchair to a large corner suite |
| Greasy or old leather to be recoloured, to ensure the colour takes properly | Adhesion primer (undercoat) | Recommended addition before recolouring: it prepares the surface and ensures the pigment leather colourant takes properly |
The all-in-one box comes in several sizes depending on the surface to be treated: a 2, 3, 4 or 5-seater sofa does not need the same quantities.
You choose the size that suits your living room, from a simple armchair to the full renovation of the whole piece of furniture. These products can be used on smooth, pigmented leathers as well as on aniline, semi-aniline or leatherette, also known as artificial leather.
Do you only need one product rather than the complete box? Each step below details the dedicated product, from cleaning to care.
How to use a renovation kit, step by step
The products in a kit are used in a precise order. Each step prepares the next, which ensures an even finish and lasting results, close to the work of professional leather restorers.
No special skill is required, and instructions come with every box. Here is the procedure, with details of each step on the corresponding specialist page.
Step 1: clean and degrease the leather
A kit is never used on dirty leather: dust and grease stop the products from bonding properly. Start with a thorough clean so that you begin with a sound surface.
The full method and the choice of cleaner according to the type of dirt are detailed on our page on how to clean and degrease the leather of your sofa before any other step.
Step 2: repair cracks and holes
Before the colour, the material is put back in good condition. The healing glue closes clean tears; for deeper missing areas, the RépaCuir paste is worked in with a spatula and sanded after drying.
The exact technique for each type of damage is described on our page on how to repair cracks and holes in your sofa.
Step 3: recolour in the colour of your choice
Once the surface is sound, the pigment leather colourant gives the leather its colour back, whether original or new. On greasy or old leather, an adhesion primer prepares the surface and ensures the colour takes properly.
The colourant is then applied with a roller, brush or spray gun, like a paint, in thin coats until the colour is even.
Choosing the colour and the complete step-by-step guide can be found on our page on how to recolour your sofa in the colour of your choice.
Step 4: protect the renovated leather
To seal the recolouring against friction and UV rays, a silky lacquer or a wax is applied as a finish. This final coat protects the colour, seals the grain of the leather and makes it last longer.
The products and techniques are brought together on our page on the final protection of your sofa's leather.
Step 5: care for the leather after renovation
Once the job is done, regular care makes the result last: the nourishing oil feeds the leather, restores its suppleness and prevents new cracks from appearing.
All the frequencies and techniques are on our page on how to care for the leather after renovation. For an overview of the process, see our leather sofa renovation page.
Invisible finish: reproducing the grain of the leather
A well-executed repair can leave an area that is a little too smooth, where the natural pattern of the leather has faded. To erase this difference, some kits add a grain reproduction tool, to be used just before recolouring:
- Reprograin: a paste that re-imprints the leather pattern onto the restored area.
- Résigrain: a very fine, fast-setting resin to redraw the texture.
Redoing your leather sofa with a kit: DIY box or workshop?
The box lets you redo leather furniture yourself and raises the question of budget differently from a trip to a workshop. Entrusting your furniture to an upholsterer involves a quote, a waiting time and sometimes transport.
The kit, on the other hand, puts everything you need directly in your home: with this box, you redo the leather at your own pace, without a prior quote and keeping control of the spend.
This solution remains a serious alternative to buying a new model, as long as the frame of the furniture is sound and only the covering needs work.
On leather that is dull, cracked or peeling on the surface, a complete box restores the seat's original look without a workshop bill.
It covers the most common case, that of tired leather on furniture that is still solid, whereas a professional is mainly needed when the frame is damaged or the upholstery has to be completely redone.
Why choose Sofolk's leather expertise?
A leather specialist since 1989, Sofolk designs and manufactures its renovation boxes in Bordeaux.
Our formulas are directly inspired by the work of tanneries, which gives them good durability and makes them compatible with almost all upholstery leathers, whatever their finish: from aniline to pigmented leather, with the exception of porous, velvety leathers such as nubuck, for which we have dedicated solutions, not forgetting leatherette.
You don't need to be a professional to succeed: instructions come with every kit, and our technical team can be reached by telephone or on the forum, where a simple photo is enough to get a diagnosis.
Unsure about the colour? Send us a small sample taken from under a seat: we will then prepare a colourant in the exact colour of your sofa.
Frequently asked questions about leather sofa renovation kits
Is it difficult to renovate the leather of a sofa with a kit?
No. Leather is easy to repair and repaint with the right products, with no DIY experience needed.
Every kit comes with instructions: all you need to do is follow the order of the steps, take your time and respect the drying times. The job is usually done in one to two days.
Can I partially renovate one part of my sofa?
Yes, it is possible but not recommended where colour is concerned: only a complete recolouring guarantees a perfectly even colour.
A touch-up kit suits a small damaged area; always allow enough product in case the result needs another go.
Should I restore just one seat or the whole sofa?
We recommend treating at least either all the seats or all the cushions. For a perfectly even and satisfactory result, ideally opt for a complete renovation of the seat.
Can leather be renovated indoors, or do I need to work outside?
It is perfectly possible to renovate your furniture or other leather items directly in your living room. The ideal is still to work in a garage to protect your floor and nearby furniture.
How long does it take to renovate a leather sofa?
The duration depends mainly on the extent of the repairs before recolouring. For a 2/3-seater sofa, allow a weekend, the longest part being the drying times: applying the products takes only around 3 hours.
Can you change the colour of your leather sofa or armchair?
Yes, the pigment leather colourant is opaque: it can restore the original colour or change it completely. To lighten the colour significantly, first apply a coat of white paint heavily loaded with pigment.
Wait about 15 days before applying the lacquer, to give the leather time to absorb the colourant fully; if the original colour reappears in places, add one or two coats.


