


Leather car seat renovation tutorial
Below you will find the different stages of leather renovation for car seats. Generally speaking, these steps are essentially the same as you would for restoring a leather sofa, with the difference that many people want a change of colour. Also, do not hesitate to consult our tutorial renovation leather sofa to glean other useful information.
Before you start, make sure you work in a well-ventilated area that is not too humid. For more comfort, ideally remove the elements to be restored. Renovating the leather is very simple to do, but it is imperative to work meticulously and carefully (it is within everyone's reach), in order to obtain an optimal result.
A good renovation also requires a good use of the products.
Observe the order of application of the products and the drying times!
REQUIRED PRODUCTS
- 2 essential products :
- 1 highly recommended product: Nourishing Oil
- 2 products in case of repairs: CicaCuir Repair Leather
REQUIRED ACCESSORIES
- Acetone (organic if possible), paper towel
- Glass paper(bodybuilder grain 240 to 400)
- 1 high density foam roller, 1 small brush, 1 sponge and a spatula
Accessories here
- If your leather is really very dry or "cardboard", you should first soften it with our Nourishing Oil or Leather Softener. Two or three applications will be enough to restore your leather to its original softness. Wait at least 2 to 3 weeks before going further in your renovation, the time to let the product infiltrate into the cuur of the fibers of your leather.
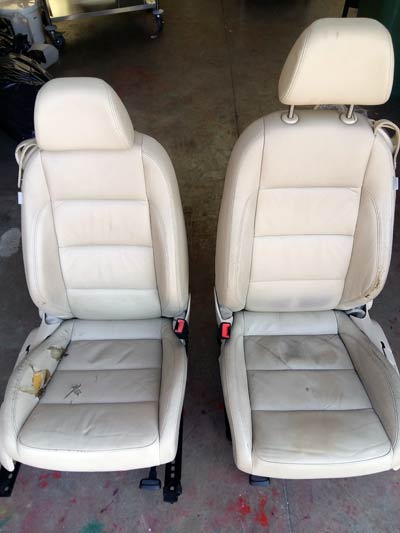
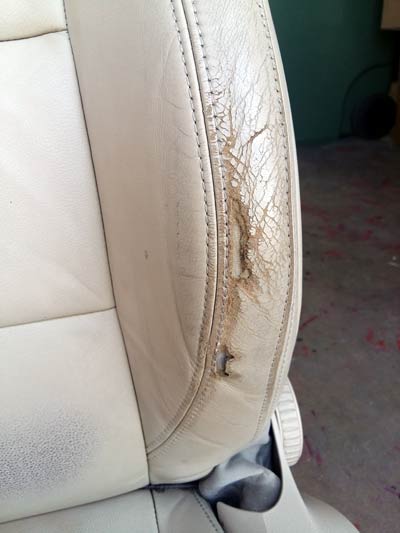
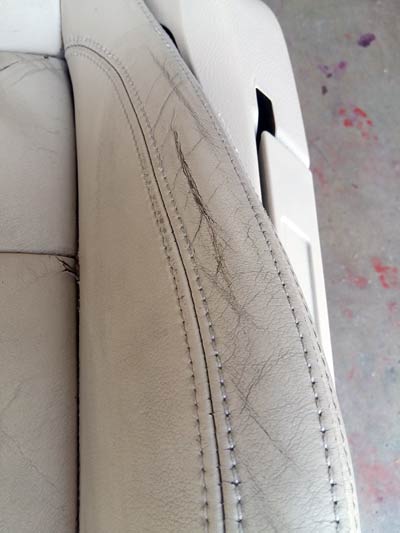
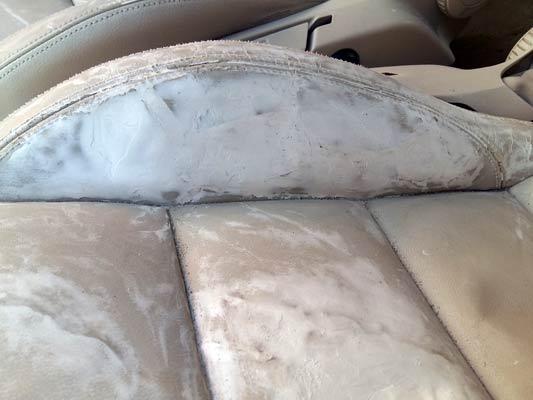
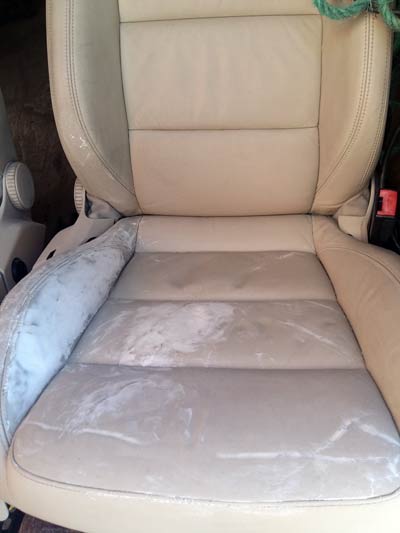
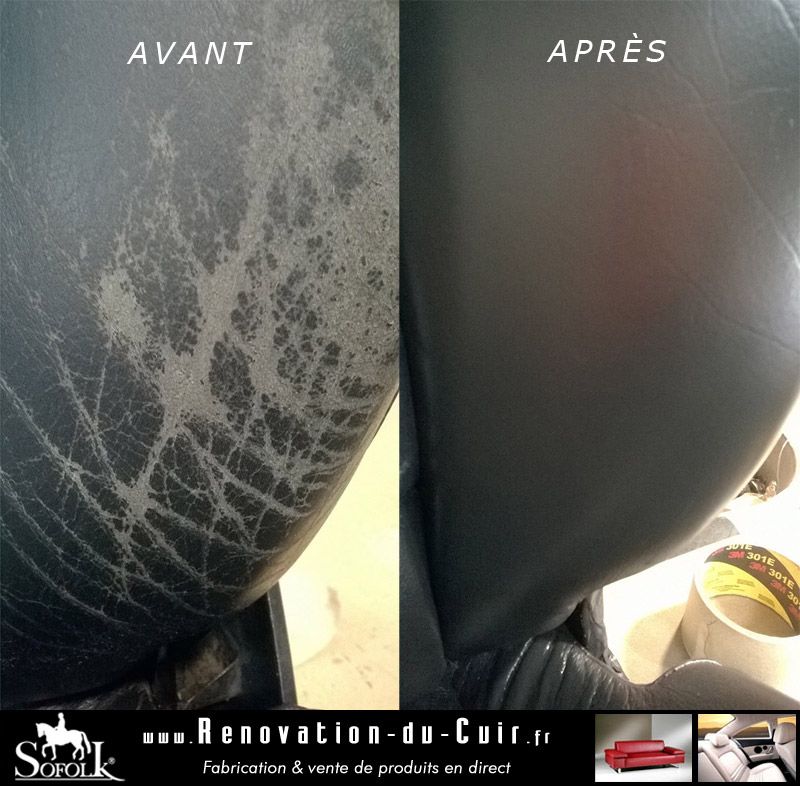
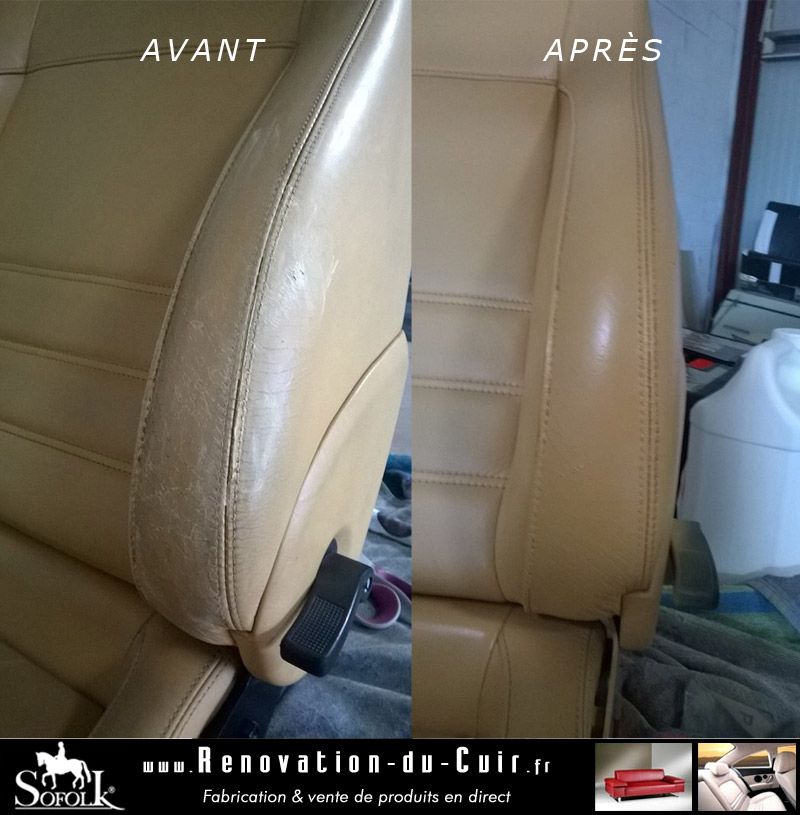
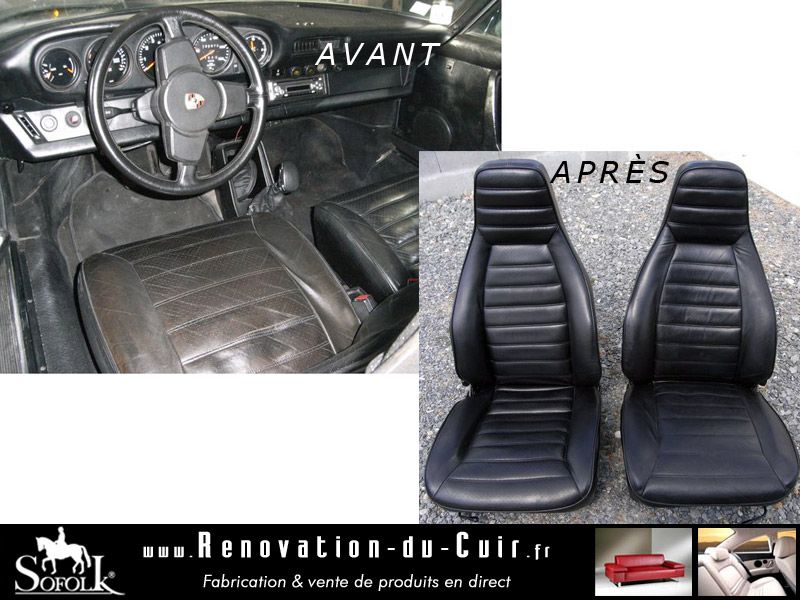
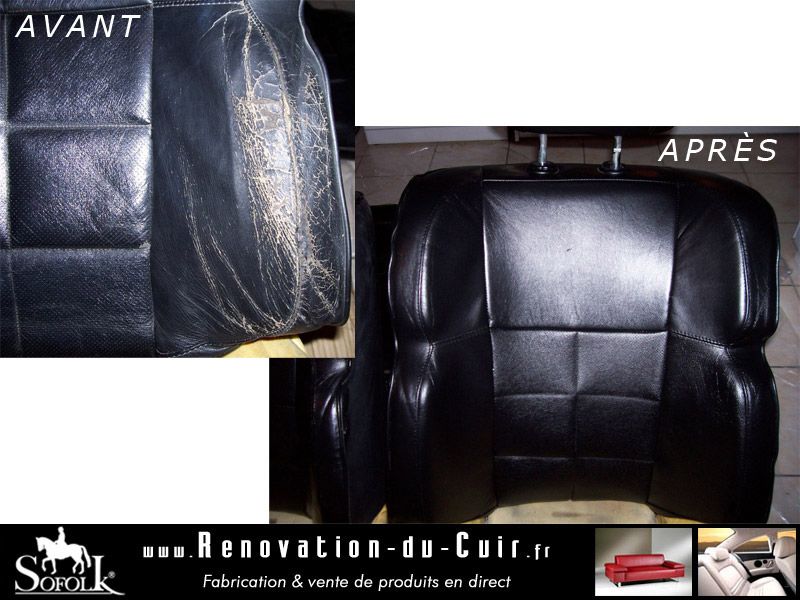
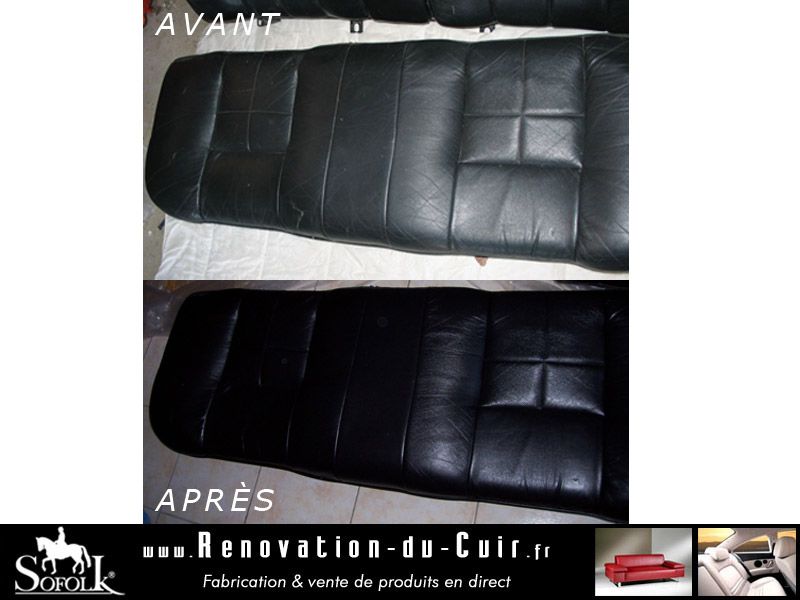
- Leather cleaning is a particularly important phase of the renovation.
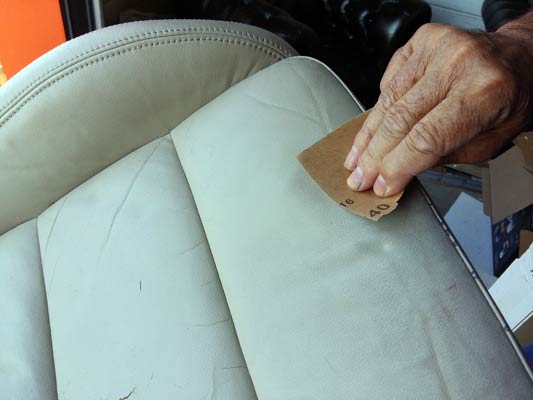
The purpose of this operation is to "break" the original protective varnish of your leather and degrease it. If this operation is not carried out properly, the re-colouring agent will not be able to penetrate properly into the leather fibres, and will become sticky to the touch, even when dry.
Start by sanding with fine sandpaper (240 grain bodywork). Then degrease with acetone (which you will find advantageously in any large surface), to remove sanding residue, varnish, silicone and dirt.
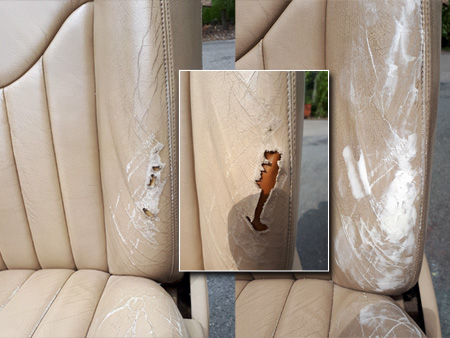
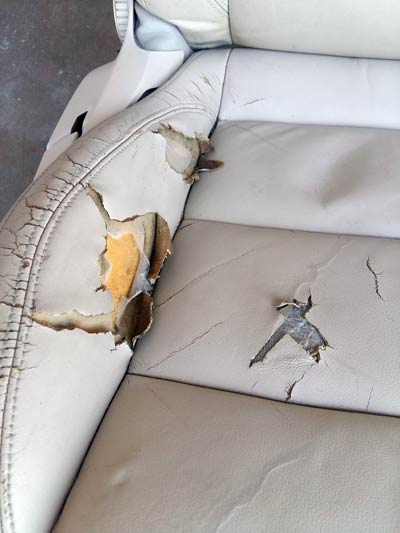
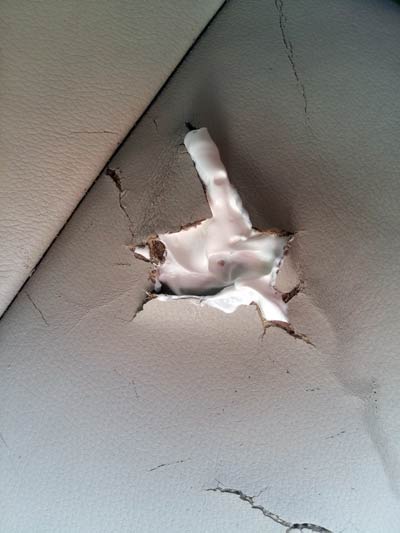
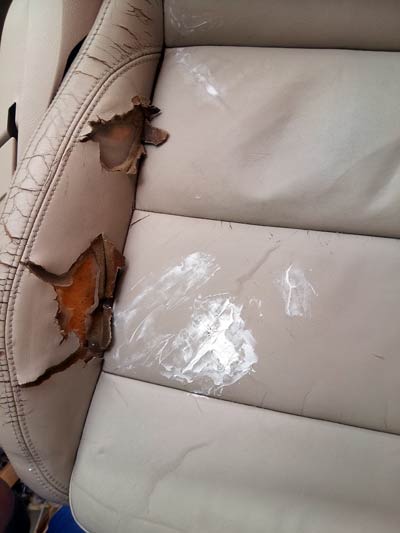
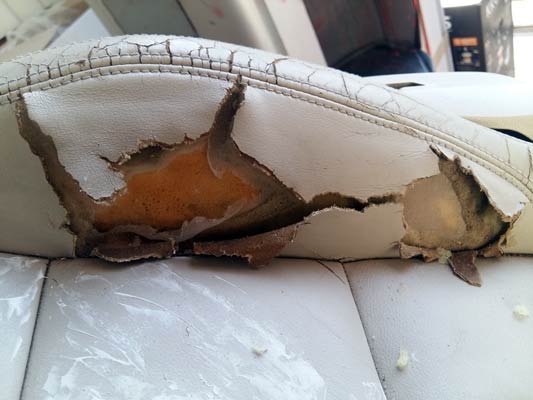
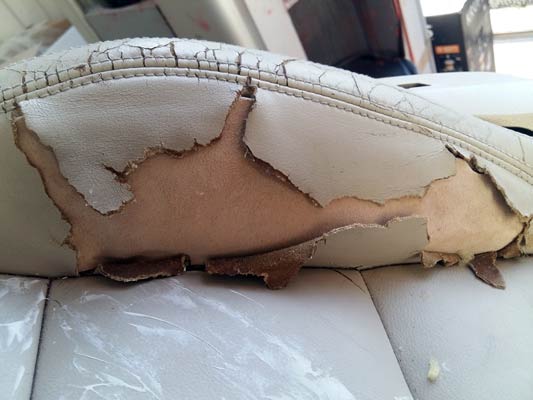
- Repair of scratches, cracks, peels, etc.
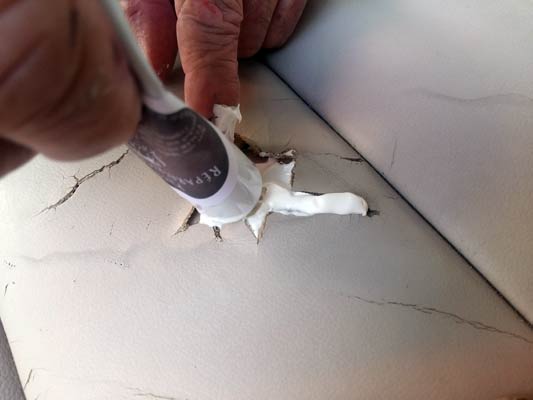
First apply CicaCuir on large cracks and porous or worn areas. CicaCuir does not only act on the surface, it also makes it possible to densify and consolidate weakened leather. The CicaCuir will also allow you to glue the raised parts of the leather flower without blisters, if this situation occurs.
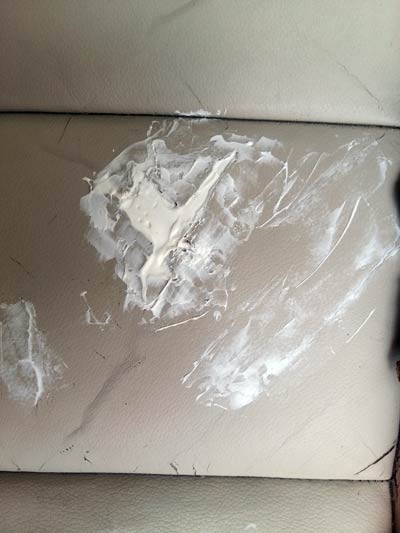
Once the CicaCuir has dried to the touch, apply the RepaCuir with a spatula. To fill the leather gaps, several applications will be necessary because the RepaCuir retracts as it dries. RepaCuir dries quickly (a few minutes), so avoid oversizes, prefer several successive thin coats and apply the product only where required.
If your leather is "peeled" in places, you will need to apply a little RepaCuir to waterproof and smooth it out so that you can re-colour it properly.
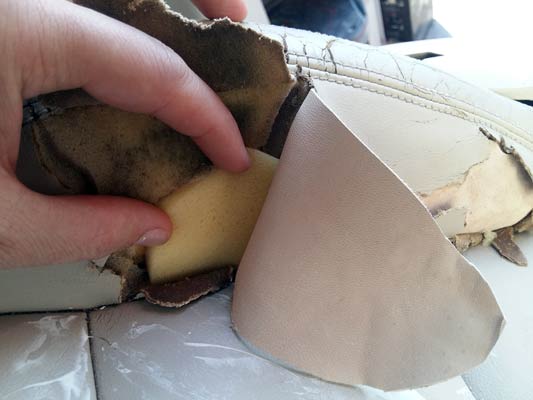
To repair a tear or an open hole, slide a piece of leather between the foam and the back of the leather, then glue and fill with RepaCuir. Wait one hour before re-colouring.
Warning: The RepaCuir has a limited stretching rate, the pulls exerted on seats where the foam is soft can cause breaks. To avoid this problem, overload with CICACUIR to limit the stretching of the leather, change the foam or laminate with a piece of leather if the cushion is removable.
Apply the Leather Repair Paste with a spatula or the right edge of a cardboard box. To fill the leather gaps, you will need several applications as the paste shrinks as it dries. Sand after each application to level and obtain a homogeneous surface.- Recolouring is carried out with a high-density foam roller or a spray gun (1 mm nozzle).
Apply one, two or three coats of Pigment Colourant. Allow a maximum of one hour at room temperature (15 to 25) for drying between each coat. Note that it is possible to speed up the drying process with a hair dryer, starting hot and then cold at the end.
For corners that are difficult to reach with a brush, small surfaces can be recoloured with a damp sponge.
Caution: Do not put two treated surfaces in contact until they are dry. For surfaces that touch, activate the hair dryer, hot at first and then cold at the end or slide a parchment paper. If the pigment recolouring agent never seems to dry, please refer to our FAQ.- The protection of your work is essential.
Silky Varnish protects the colouring first, then the grain of the leather and then from repeated rubbing. It prevents fouling while waterproofing and gives the final colour to your renovation.
Apply two coats of varnish with the foam roller 48 hours after re-colouring, and one coat 15 days later.
- Feeding the leather
The Nourishing Oil that we are the only ones to recommend is essential to restore the leather's suppleness, its resistance to stretching and tearing.
Wait a fortnight after applying the varnish to spread the Nourishing Oil by massaging the leather, the Oil, once infiltrated into the fibres of the leather, never comes out, but it can take time to penetrate after a recoloration.Maintenance after renovation is decisive in the lifetime of the renovation
An application of Oil at least once a quarter in the most stressed areas and Varnish at least twice a year in these same areas.
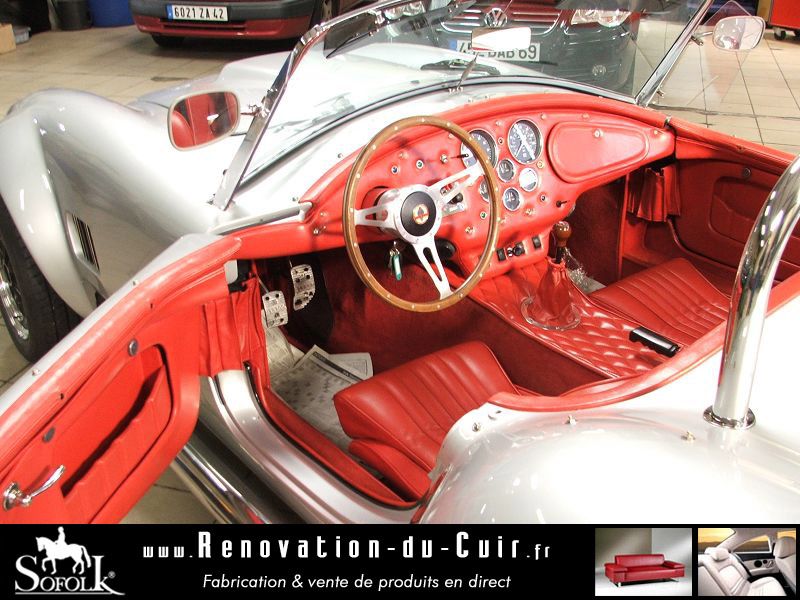
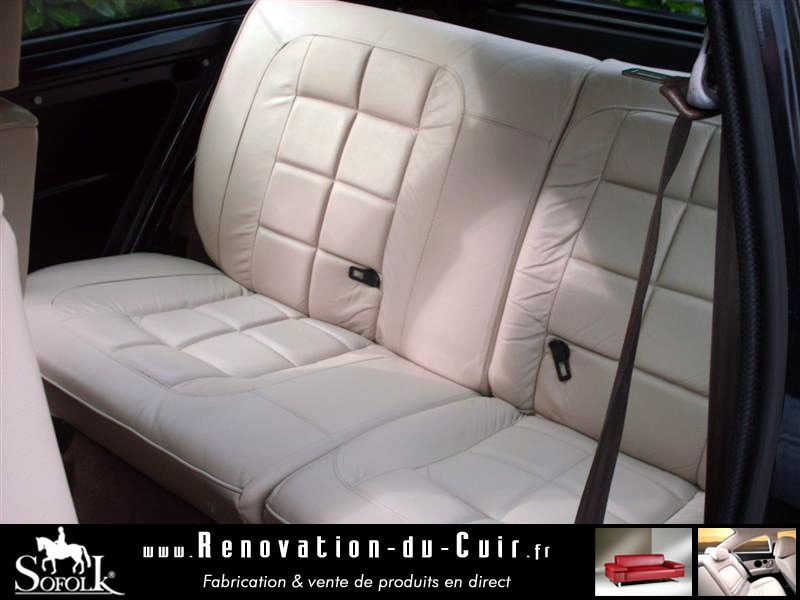
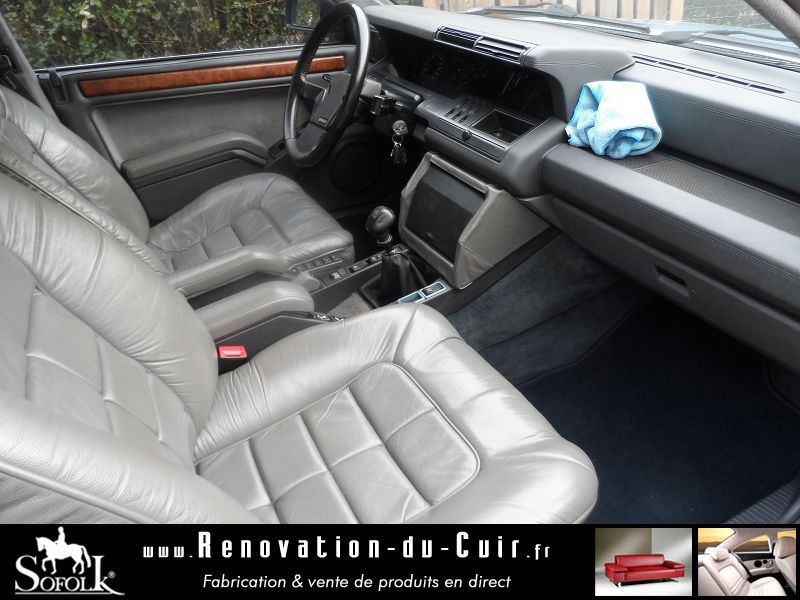
Other examples of renovations carried out by our clients:
- Renovate your leather interior (by 205 magazines)
- Renovation of leather upholstery 607 (by philou6871)
- Renovation of 205 rolland garros seats (by Chrisfun)
- Test of our leather car seat renovation kit (by Katoki)


answer
Hello,
There are no particular problems to renovate these seats except to choose the right yellow one which is not in our colour chart. You can send us as a reference to make this colour as well as a yarn reel as a piece of fabric or a coloured paper. However, we advise you to grease the leather before renovating it.
Qty.
reply
answer
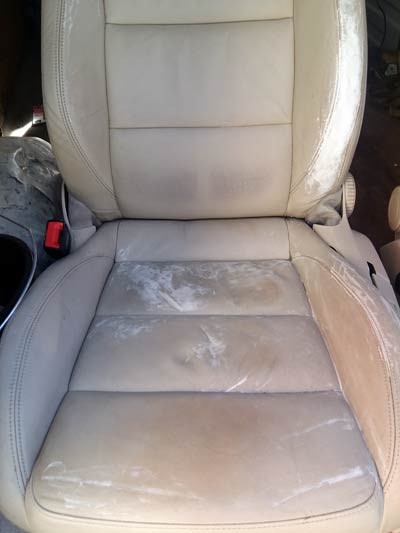
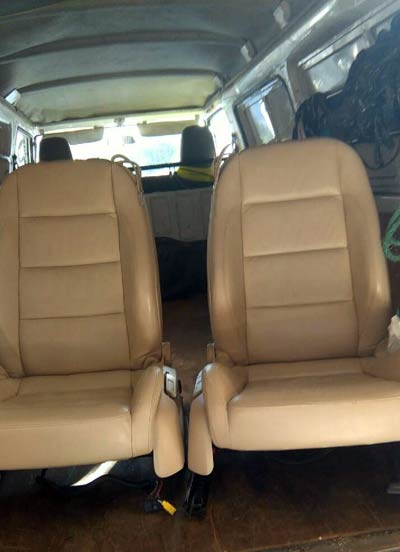
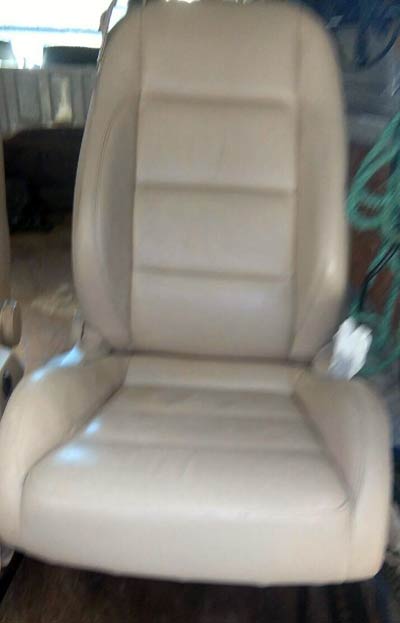
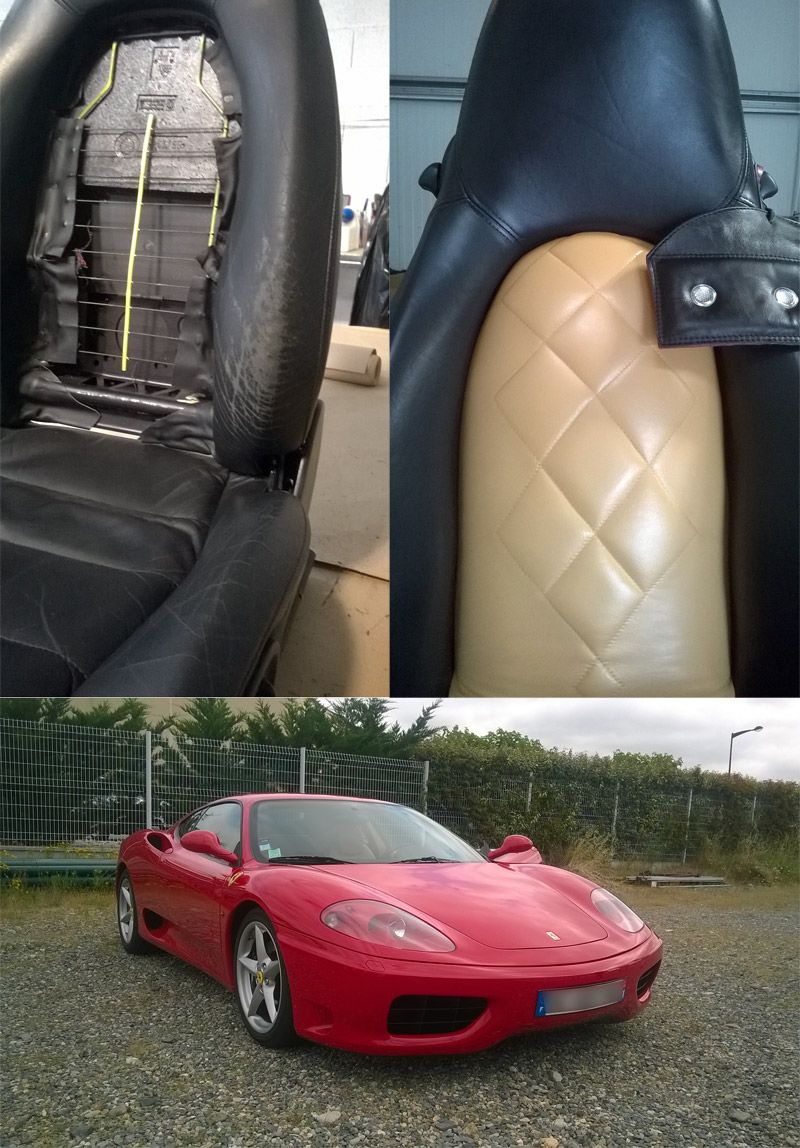
A big thank you to the Sofolk team who allowed me to successfully renovate my car seats that I sincerely would not have thought possible. I had nothing to lose so I went for it and I was absolutely amazed! Of course it took me a little time, but overall I didn't encounter any particular difficulties, it's relatively easy to do when you have the right products and good advice as indicated in this tutorial.
Judge for yourself by viewing my photos that I was able to take as I went along.
reply
answer
Hello,
In the renovation kit for a car, there is the offer of a Matt Anti UV Spray. Is that able to be used with the car seats still within the car or would it be best to just purchase the bottle?
reply
| OTHER SIMILAR TOPICS | |
|---|---|
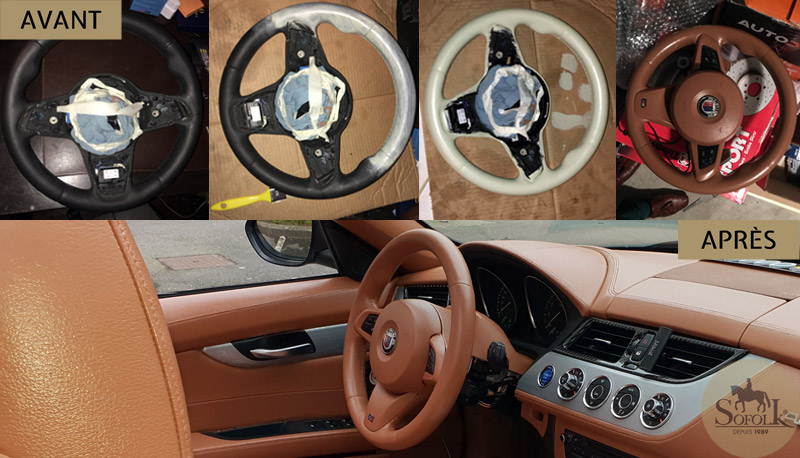
| Leather steering wheel renovation tutorial
Par Philippe, le 30/12/2017 |
|
| Leather car seat renovation tutorial
Par SOFOLK, le 04/02/2019 |
|
| Delivery areas
Par Drahid, le 28/05/2026 |
|
| Cuir spider 2001
Par Cédric, le 28/02/2026 |
|
| Leather beige volvo s90
Par Ionut Dumitrache, le 12/01/2026 |
|
| Mercedes leather code 205a
Par RAL, le 15/12/2025 |
|
| Paint request
Par Guy, le 03/12/2025 |
|
| Airbrushing? which product
Par Gallybagger, le 15/06/2025 |
|
| Bmw new england beige (lbab code)
Par Jar, le 10/05/2025 |
|
| Bmw
Par RENO, le 21/04/2025 |
100% french manufacturing since 1989!
Payment by CB, PayPal, Bank transfer
2 to 5 working days

+33 5 57 34 69 72
From Monday to Friday
from 10.00AM to 12.30PM and 13.30PM to 18.00PM

answer
reply